

This tutorial covers the shortest path between opening PulsoGym for the first time and walking away with a logged session. You do not have to decide everything at once: you can create a simple program today and enrich the days later, with drop sets and supersets, as the training asks for it.
1. Create the program
On the Workouts tab, tap New program. A program has a name, a goal (build muscle, burn calories, endurance, general fitness, or custom) and how many days a week you plan to train. None of these fields is final — you can edit everything later, including changing the goal mid-cycle.
2. Add the days
Inside the program, each day gets a letter — A, B, C — and, if you want, a name: Heavy Push Day, Lower Body, whatever makes sense for your training. The order of the days does not have to follow the order of the week; it is just a label so you recognise the day when you pick it.
3. Add exercises to the day
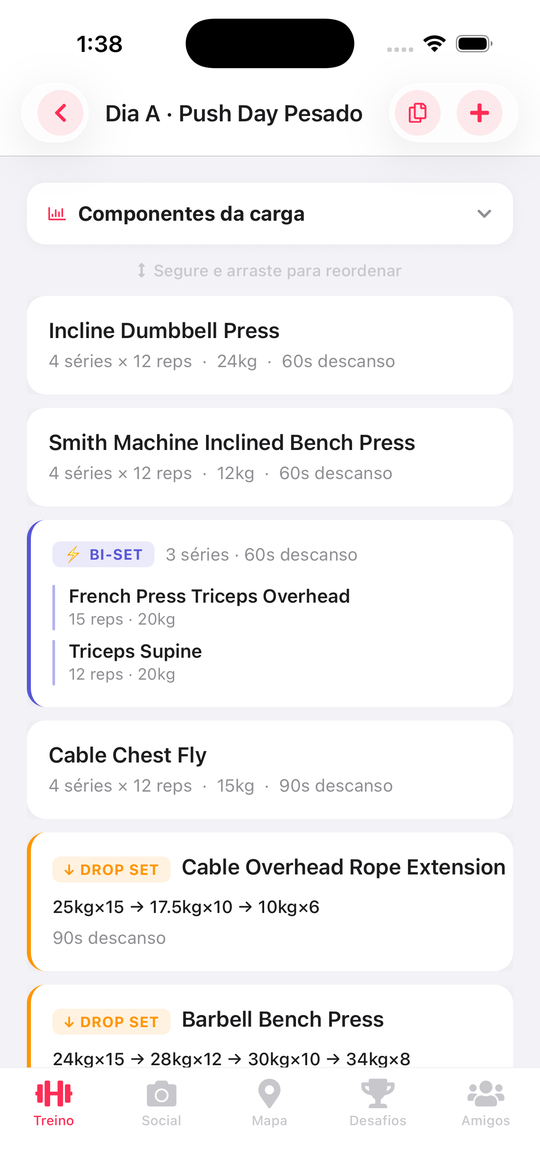
Pick an exercise from the library (with a card, an execution GIF and the muscle worked) or type the name by hand. For each one, set sets, reps, load and the rest between sets.
If the exercise needs more structure than "sets × reps", PulsoGym stores that as data, not as a loose note — which is what the next two steps show.
Drop set
When you mark an exercise as a drop set, you add as many load steps as
you want, each with its own weight and its own reps — for example
25 kg×15 → 17.5 kg×10 → 10 kg×6. The sequence stays ordered
and enters the session volume that way, step by step.
Superset
A superset combines two exercises done back to back, with no rest between them. Each side keeps its own load and its own reps, and the two appear together on the same card during the workout — you log the pair as a single set.
4. Check the cost of the day before training
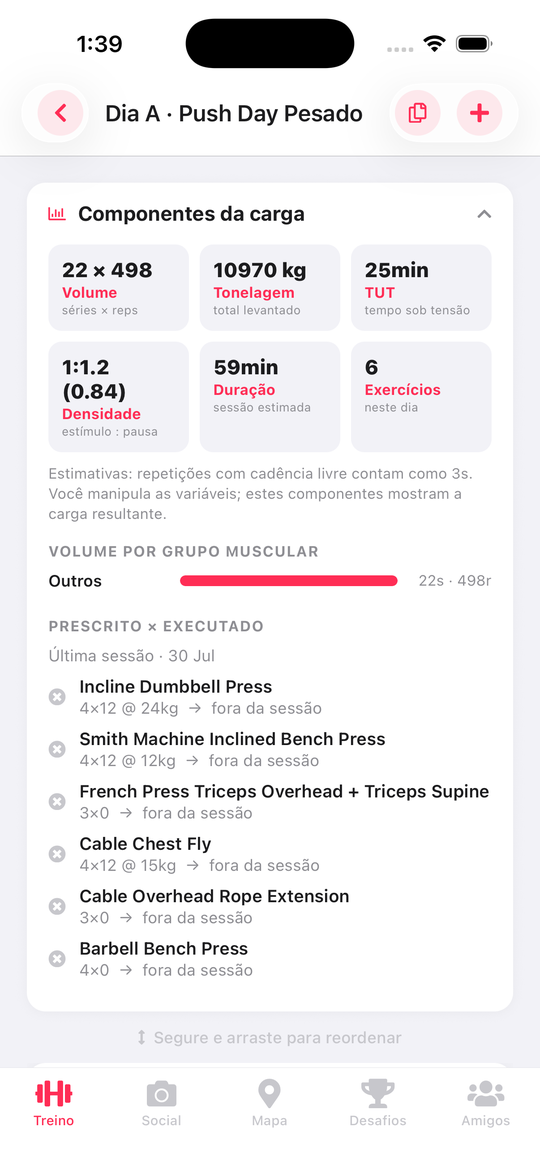
Before you train, the day shows volume, tonnage, time under tension, density and the estimated duration of the session — all calculated from what you just prescribed. If the panel says 90 minutes and you only have 45, you can cut an exercise right there, before finding that out at the gym.
The article Components of training load explains what each of those numbers answers.
5. Run the first session
On the home tab, tap Start session and choose the day. The live session shows one exercise at a time, with a clock running in the background and one circle per set: tap to mark it done, enter reps and load, and the rest timer starts on its own. At the end, a summary with duration, volume and the perceived-effort scale closes the session — and it goes straight into your history and your progress chart.
From here the cycle repeats: train, log, look at the progress, and adjust the program when it makes sense. You do not have to get everything right the first time — the program is yours, and it can be edited at any moment.